Industrial Coatings

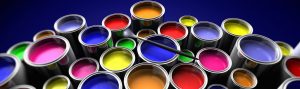
An industrial coating is a paint or coating defined by its protective, rather than its aesthetic properties, although it can provide both. The most common use of industrial coatings is for corrosion control of steel or concrete. Industrial coatings are used in production plants and by qualified applicator shops to coat discrete parts, finished assemblies (automobiles, trucks, aircraft, vessels), tanks, piping, metal sheet, continuous webs, wood panels, paper, and paperboard.

Types

Coatings can be classified into a number of categories based on their composition and function.

Lacquers – coatings made from the clear sap of the lacquer tree that produce a hard, durable finish to decorate and protect wood, metal, and other surfaces.

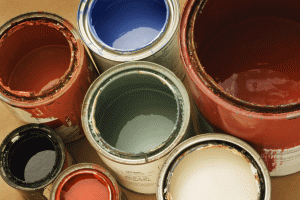
Paints – a large category of coatings including pigmented liquids or powders used to protect and/or beautify substrates. The two general classifications of paint are enamels and lacquers.

  • Enamel paints both dry and cure once applied to a surface. They are extremely stable, and can last for decades if stored properly. They also have lower levels of volatile organic compounds (VOCs) and are more environmentally-friendly. Enamels dry/cure times are typically much longer than lacquers, but newer catalyst additions are reducing that time difference.
  • Lacquer paints dry but do not cure. They dry harder, smoother, and more quickly than enamel paints and are easier to sand since enamels can be gummy; however, lacquer paints are not as tough and will chip or crack more easily than enamels.

Powder coatings – coatings which are applied as free-flowing, dry powders. These coatings are dry, meaning they don’t require a solvent to keep the components together. Powder coatings are applied using either an electrostatic spray (see image right) or a fluidized bed. Parts are heated before or after application to fuse the particles together and bind them to the surface.

Primers – preparatory coatings that are applied to treat a surface before the application of another coating. They are primarily designed to increase coating adhesion to the substrate surface. Some primers also lend uniformity to the topcoat, inhibit corrosion of the substrate, and/or stop coating discoloration.


More Types

Sealers – coatings defined as surface sealants used to seal the substrate surface, providing protection from contamination and corrosion. They are applied to porous castings, powder metal parts, stator windings, and transformers to seal the surfaces and/or internal porosity by soaking into or impregnation through the open pores.

Stains – semitransparent or semisolid coatings used to accent wood grains and add protection. Semitransparent stains penetrate the wood without forming a film, allowing much of the wood grain to show through the finish. Semisolid stains act more like paints, forming a protective film and not deeply penetrating the wood.

Varnishes – transparent, hard, protective finish consisting typically of a drying oil, resin, and thinner or solvent. They are applied as liquids to wood or other materials to provide a colorless coating that protects from abrasion, chemical attack, water damage, and in some cases UV light.

Properties

The main purpose of industrial coatings is to add or enhance a material’s properties. Buyers should select coatings based on what properties are important to their specific application. Properties involving coatings include:

  • Chemical resistant – coatings which resist acids, alkalis, oils, and general chemicals.
  • Conductive – coatings used to form an electrically-conductive layer.
  • Corrosion inhibiting – coatings which prevent moisture from reaching the metal or underlying substrate, or provide a sacrificial layer.
  • Heat resistant – coatings resist damage from heat, or are formulated for use in high-temperature environments.
  • Protective – coatings are designed to protect substrates and surfaces.
  • Touch-up – coatings are used to repair and match the original coating where it has been damaged by scratching, corrosion, abrasion, erosion, scuffing, denting, chipping, delaminating, or other processes.
  • Waterproof / water repellant – coatings are clear, exterior finishes that cause water to bead-up on the surface. They also minimize the penetration of water into the substrate.
  • Wear resistant – coatings are designed to resist wear or erosion. Wear is caused by a sliding action between two or more components. Erosion is surface damage or material removal caused by the impact of particles or slurries.
  • Weather resistant – coatings are weather-resistant or protect against damage from UV radiation.


Sources: Engineering 360 powered by IEEE GlobalSpec

Viking Paints, INC.

Epoxy Floor Coating – 7 Step guide to apply

Epoxy Floor Coating – 7 Step guide to apply

Preparing the surface

Step 1. Prepare the surface. Preparation of the substrate is necessary in order to ensure adhesion between the epoxy product and the substrate. Suitable methods are sanding or diamond-grinding. Any surfaces that have been contaminated with oils may also require chemical cleaning.

Prepare the surface with a suitable surface preparation floor grinder

Step 2. Sweeping and cleaning of the floor. Use an industrial vacuum that picks up even small dust particles. The floor must be cleaned of all dusts and residues before starting to prime. Otherwise you will have various particles trapped within the coat and adhesion will be significantly weakened. The less micro-dust on the surface the less primer you will need.

Vacuuming dust from epoxy floor

Priming and Filling

Step 3. Prime the floor with a suitable epoxy primer. Always prime the floor, don’t believe claims that priming is not necessary. Priming will give your floor a longer life and better adhesion to the substrate. Furthermore it will seal the substrate thus eliminating the risks of bubbles and gasses. Priming also helps reduce the amount of product that will be required in the later stages. Ensure that the areas are ventilated properly. It is common to coat two layers of primer in order to properly seal the floor. Use a proper electrical mixer to mix the A and B component of the primer.

Priming the surface with epoxy primer

Step 4Fill all cracks, holes etc with epoxy grout. (This step can also take place before priming if you prefer) For thin cracks it may be necessary to slice them with a diamond cutter before filling in order to improve the anchoring of the grout.

Filling cracks with epoxy grout

Applying the epoxy floor coating

Step 5. Application of the first coat of epoxy paint. Empty all the contents of the hardener in the component A. Use an electrical mixer and mix at least for two minutes. Don’t skimp on the mixing! This step is very important. Poor mixing will lead to a tacky floor!

Proper mixing of the two epoxy paint components is very important

Step 6. Apply the product with a roller. Use a good quality roller, as poor quality rollers may start to shed. You should be able to re-coat after 24 hours. The next day you may notice various problems that have appeared such as cracks, holes etc. Make sure that these are sealed-filled before starting the next coat. You may also need to sand some uneven surfaces that appeared after the first coat. If necessary wait an extra dry for the grout to dry before re-coating.

1st coat of epoxy floor coating

Step 7 Apply the final coat. Before placing the final coat make sure all holes and cracks have been filled, and that all dust has been collected. Otherwise you will get an ugly texture on the final surface. Remember most epoxy products have a pot life of approximately 40 minutes (or less) so only mix one bucket at a time and get to work immediately.

The final result is a beautiful coated surface


Source: LEARNCOATINGS © 2017 By 

New colors, a new world of pigments continue to evolve from accidental blue discovery

CORVALLIS, Ore. – A bright blue compound that was first discovered by accident seven years ago in an Oregon State University laboratory – and has since garnered global attention – has no led to the more rational and methodical development of other colors that may ultimately change the world of pigments.

Findings on the newest pigments, in shades of violet and purple, were just published in Inorganic Chemistry, a journal of the American Chemical Society.

More important, researchers say, is that progress made since the first accidental discovery of this family of inorganic compounds has allowed intensive science to take the place of luck. What’s emerging is a fundamental understanding of the chemistry involved in these “trigonal bi-pyramidal” compounds.

As the basis for pigments, they are quite remarkable.

Compared to the flaws that exist in many of the compounds they replace, they are all thermally stable, chemically inert, non-toxic and non-carcinogenic. For commercial use, they also have the extraordinary characteristic of reflecting heat, which is highly unusual for dark colors and potentially of great value for saving energy.

All of the compounds have been patented, and are being developed commercially by a private company. Yellow, green and orange colors have already been created, along with the original blue. The research has been supported by the National Science Foundation.

These developments began in 2009 when OSU researchers were studying some manganese oxide compounds for their potential electronic properties, and when one compound came out of an extraordinarily hot oven – about 2,000 degree Fahrenheit – it had turned a vivid blue, now known as “YInMn” blue.

The scientists noticed and took advantage of this unexpected result. They used the compound to create a pigment that was environmentally benign, resisted heat and acid, and was easily made from readily available raw materials.

“No one knew then that these compounds existed,” said Mas Subramanian, the Milton Harris Professor of Materials Science in the OSU College of Science, and corresponding author on the new publication.

“Now we’ve been able to move beyond the accident and really understand the chemistry, including its structure and synthesis. We can produce different colors by using the same basic chemical structure but tweaking things a little, by replacing manganese atoms by iron, copper, zinc and/or titanium. And we’re slowly moving toward what we really want, what everyone keeps asking for, the Holy Grail of pigments – a bright, new, durable, nontoxic red.”

Along with blue, Subramanian said, a stable, non-organic red pigment would have huge commercial demand.

In this process, the OSU researchers are opening the door to new, inexpensive types of pigments that leave behind some of the toxic compounds historically used to create colors – lead, cadmium, mercury, even arsenic and cyanide. And the bonus of solar heat reflection has huge value for many applications, such as building construction or vehicles, where this characteristic can reduce cooling expenses and something other than white is desired.

Based on the novelty of the discovery and the growing value of these pigments, this research has captured international media attention and broad public fascination – a single online video received 14 million views.

The newest colors of violet and purple, the researchers noted in their study, have long been associated with royalty, aristocracy, piety and faith. The first pigments of these colors date back to cave paintings in France in 25,000 B.C., they said. And Chinese Han purple, the first synthetic purple pigment, was found in some murals in tombs more than 2,000 years old.

Pigments still being used to produce these colors are in some cases chemically and thermally unstable, and subject to increasing environmental regulations.

Applications of the new pigments, the researchers said in their report, may be found in high-performance plastics and coatings, building exteriors, cool roofing, vinyl siding, automobiles, and even art production or restoration.

Source:

David Stauth

Mas Subramanian,

mas.subramanian@oregonstate.edu

Dispose of paint properly

If you want to dispose of paint in the proper way, that rules out tossing a can with wet paint into the trash. The paint may end up pouring into your garbage can, spilling inside the trash truck and worse yet, leaking onto roads where it can be splattered permanently on vehicles driving through the spillage. Pouring it down the drain is harmful to the environment. There are, however, responsible and safe guidelines on how to dispose of paint, depending on the type.

How to Dispose of Latex, Acrylic and Water-Based Paints

To dispose of paint that is latex, acrylic or water-based, the guidelines are easy to follow:

  • Use it up
  • Pass it on
  • Dry it up

Use It Up

Calculate carefully and buy only the number of cans you need before your paint project. This will cut costs and prevent having to figure out how to dispose of the extra paint later. You can expect one gallon of paint to cover between 250 and 350 square feet, depending on the condition of the walls and the number of coats you’re applying. When you purchase paint, ask the store about its return policy for unopened cans.

When you do have some left over, the last of the can may be just enough to cover a table or shelf. Sometimes the underside of a project needs to be covered and leftovers will do. Small quantities of paint can be combined with other shades when a coat of paint, but not the color, is central.

Pass It On

Recycle, recycle, recycle, is a practical way to dispose of paint. Community groups,theater groups, schools and perhaps neighbors may appreciate the offer of leftover paint. Local recycling centers often have an area set aside to share partially full, non-rusted cans of paint.

Dry It Up

If you decide to dispose of paint in the trash, it must be dried out or hardened. To dry out a can of paint that is less than a quarter full, simply take off the lid and leave it in a well-ventilated place for a few days. Fuller paint containers can be dried out more quickly by adding mulch, kitty litter, shredded paper or a paint hardener from the hardware store. Follow directions carefully for the paint hardener.

With the lid removed, dispose of the dried latex, acrylic and water-based paints. Some municipalities prefer the paint cans to be separated from the other garbage. You can place the cans beside or on top of the trash container with the lid off so the trash collector can see that they’re empty or dried out.

There is no need to take latex, acrylic and water-based paints to a hazardous waste collection site, as this costs tax payers money for unnecessary disposal. Some counties recycle paint cans, so check with your local recycling center.

How to Dispose of Oil-Based Paint

To dispose of paint that is oil-based, the guidelines are similar to those for latex, acrylic and water-based paints, except you cannot safely throw oil-based paint in the trash. Your options are:

  • Use it up
  • Pass it on
  • Dispose of it

Use It Up

Oil-based paint is messier to work with than latex because it doesn’t wipe off easily and it requires paint thinner for cleanup, so you should plan to paint all your projects at once. This will serve your home well and disposal will be made easier when you empty the paint can.

Pass It On

Ask around to see if anyone has an upcoming paint project and needs what you have left over. Mention it is oil-based, since some people prefer paint that is water-soluble.

Dispose of It

If discarding it is necessary, oil-based paint needs to be disposed of at a hazardous waste collection site. The chemicals in oil-based paint are flammable and can be harmful when handled or breathed.

How to Dispose of Spray Paint

Empty cans of spray paint can be thrown away for regular trash pickup. Sometimes aerosol cans are recycled, so check with your local recycling center. If the can still has paint in it but is unusable, dispose of it, along with oil-based paints, at the hazardous waste collection site.

For states CA, CO, CT, DC, ME, MN, OR, RI, VT you can visit the PaintCare link below

Homepage

If you have questions about how to dispose of paint, call your local waste authority.

Source: Networx Systems, LLC.

Different Paints

Epoxy Paint

Oil or Latex?

Paints come in two main varieties: Latex and oil-based So what are the differences, advantages and disadvantages?

Latex paints are water-based and have some fantastic and useful advantages, such as being durable, fast-drying, low-odor, easily applied and can be cleaned up simply with soap and water. Latex paints also resist yellowing better than oil-based paints and have better mildew resistance. These advantages makes latex based paint ideal for bathrooms, kitchens, and laundry rooms, where there is often moisture.

Oil paints of high quality are harder paints and have better abrasion resistance than latex paints. They also have a slightly higher gloss than the latex-based paint. A great perk to oil-based paint is that it goes on smoother and is more durable in the long run. A disadvantage to keep in mind is that these paints have a stronger odor, take longer to dry and cannot be cleaned up with just soap and water (a solvent such as paint thinner needs to be used for cleanup).

What Type of Sheen?

Paint sheen simply means the level of glossiness in paint. Today, most paints come in one of the following sheens: flat, satin or eggshell, semi-gloss and gloss.

Flat paint is the standard for most walls. It has the lowest sheen available and when it dries, it appears completely non-reflective with a smooth, matte finish. Flat paints are great because they conceal imperfections on walls that were there before you painted – as well as imperfections that occur after you paint. This is the reason why flat paint is recommended most for painting drywall surfaces or a surface that is not sanded well. Flat paint can help to make the surfaces look smoother and more uniform, and if the wall or surface gets any scratches, you won’t have to worry so much, as nicks and scratches blend in fairly well to flat paint! One of the big disadvantages to flat paint is that it is hard to clean. Because of its somewhat porous texture, the paint can hold onto dirt and make cleaning more difficult. Your best bet is to use it in areas that are not frequently soiled.

Satin, or eggshell paint, is also known as low-luster paint. While these paints are low-luster, they are more lustrous than flat paint and have a nice, slight sheen when compared to flat paint. The slight sheen is what makes eggshell paint able to bring a warm look and feel – and depth – to a room. This kind of paint is also easier to clean and can be used on any wall in your home. Paint a small area of a wall with eggshell paint to make sure this look what you want to achieve.

Semi-gloss paints are very popular in homes with young children because it is the easiest to clean among all the paints. This is the reason why semi-gloss paint is frequently used for children’s rooms, kitchens and bathrooms; it is so durable. If you choose to go with a semi-gloss paint, then make sure you choose one that is 100% acrylic latex, since that is the highest quality latex paint. Keep in mind that semi-gloss paints show a lot of imperfections, so if you have imperfect walls and young children, you may want to weigh out the pros and cons. Your best bet is to use it for the kitchen, bathroom and kids’ rooms.

Gloss paint is the toughest and most durable of all paints – and the shiniest, too! This very high sheen paint is often used on doors and in areas susceptible to getting dirty. It is also used on trim, baseboards and door frames.


Source: Networx Systems, LLC.

Coating metal surfaces

If you’ve ever wondered about refurbishing a metal object, or about painting metal surfaces in general, this is completely doable using metal primer. It’s also fairly easy to accomplish! Even better, metal surfaces of repurposed objects do not require you to maintain the previous paint color, which can open the door to all sorts of interesting projects. As long as you prepare your metal properly before applying the paint, you will be able to complete this task easily.

Work in a ventilated area. Working around paint and rust particles can be harmful, so choose a well ventilated area where you can put a drop sheet down underneath your metal project. Wear gloves and a dust mask while you work.

  • Keep a damp cloth nearby to wipe away paint, dust and rust particles periodically while you work. This is much safer for you than waiting until the end to deal with them.
  • If there is any chance the paint you are stripping may contain lead, the dust mask is an absolute must for your own safety.

Remove the old paint from the surface. Use a wire brush to strip the paint from the metal, remembering to wipe dust and paint particles away with a damp cloth as you work.[1] If you prefer, you can use sandpaper to remove the paint.

  • A combination approach is best – stripping large surfaces will go much faster with a wire brush, and then use the sandpaper to get in the nooks and crannies.
  • A cordless drill with a wire brush attachment is also an option, and a good one if you are stripping away paint from a large surface area. Remember to wear protective ear muffs when operating drills.

Clean the surface of the metal. Wipe away all paint dust with a damp cloth and discard the cloth. Scrape off any hunks of remaining paint. Use a fresh cloth to give your metal a thorough rub down, cleaning off all loose paint, dirt, grease and grime from the surface.

  • Even if the surface looks fairly clean, don’t skip this step. You want the surface of the metal to be virtually spotless, or as close as you can get to it.
  • Failure to clean your metal properly will result in a lousy paint job. The paint won’t stick to the metal properly and will peel off easily.
  • Oils on the surface of new galvanized metal, which may or may not be visible to the naked eye, can hinder your paint job if they aren’t removed. Use a simple detergent solution to wipe down new galvanized metal.

Sand down the metal until it is as smooth as possible. This will ensure that you get the longest life out of your paint job. After sanding, wipe down your metal one final time with a damp cloth to remove any lingering debris.

Apply a zinc-chromate primer first if the metal is rusted. You will want to do this before you put on the regular primer, but only if you are working with rusted metal. If your metal isn’t rusted, start with the usual oil-based primer that is described below. Before application, scrape off any loose rust and wipe it down to remove any flakes or residue. Once the rust is removed, coat the metal with zinc-chromate primer before using a full-bodied primer.

  • You will need to prime your surface with the full-bodied primer immediately after you use one of these products, so don’t apply them until you are ready to prime.
  • Zinc-chromate is a corrosive resistant substance. You spray it on first because you want it to be closest to the surface of the metal, to protect it from rust. After applying this substance, you should immediately apply the regular “full-bodied” primer so that the zinc-chromate remains as the first layer. It also acts as an adhesive for the full-bodied primer.

Choose an oil-based primer. Make sure your primer and your paint are compatible with one another.  Look for primer products that are made specifically for metal, as well, since these will best adhere to the surface.

  • Most primers come in a spray can for ease of use, but if you prefer to use a brush to apply it, metal primer also comes in a bucket or can for that purpose.
  • Primer prepares your surface so that the paint will adhere well, but it also helps to smooth out any color and texture that you weren’t able to remove from it.

Paint the surface. Make sure not to apply thick coats, it is much better to apply multiple thin coats.

How to paint over a chrome surface

Painting over chrome isn’t as easy as regular metal. The common misconception is that chrome is used as a protectant because it doesn’t corrode. The reality is exactly the opposite — chrome almost immediately oxidizes or “rusts” when it comes into contact with oxygen. But chrome oxide “rust” is completely clear and very fine, providing a glass-like shine over the nickle plating beneath, and a finish that’s smooth and slick to the touch. Painting directly onto chrome, you’re effectively spraying a shell over very fine “rust” — this reality necessitates somewhat more intensive preparation to keep your new shell of color from simply falling off.

1

Wash the chrome piece with basic soap and water and dry it thoroughly.

2

Sand the entire piece with 220- to 320-grit paper and use 120- or even 60-grit for specific areas if you have deeper scars, rust or pits. You must get below any damaged spots. A pit in the chrome left alone will pop out in no time and ruin your paint. You may even need to use a grinder if the 60-grit paper will not get you below the damage. Follow up on the entire piece with 320-grit paper; your objective is to have minimal scratching from the previous sandpaper and end with a 320-grit finish. Always wear safety glasses if you use a grinder.

3

Fill in any low spots in the metal from deep sanding or grinding either with liquid steel from a tube or glazing compound if the fill-in area is less than 1/8-inch deep. Once compounds are dry, sand level to the original surface with a heavier grit and follow up with 320 grit.

4

Using a clean cloth or tack rag, wipe the piece off to completely remove all sanding dust, and then wipe down the piece with either lacquer thinner or wax remover.

5

Put on your face mask and spray the entire piece with the self-etching primer. Two light to medium coats will do. Allow time to dry between coats. This special primer will grip to the metal and prepare you for regular primer and paint.

6

Once the self-etching primer is dry, spray two to three coats of the high-build primer over it, always allowing each coat to dry before applying another one.

7

Inspect the piece visually and also by rubbing your hand over it, and use glazing spot putty to fill in any remaining flaws or pinholes in the primer. You can get a better feel for flaws if you wear a cloth glove and run your hand over the piece slowly.

8

Sand any glaze down with 220- or 320-grit paper and then sand down the entire piece, including the edges, with 600-grit paper so that you end up with a very smooth finish. Be sure to sand down any runs you may have from the primer. Chips or flaws will show up even more once paint is applied, so spend time here to obtain a smooth surface.

9

Wipe down the piece again either with lacquer thinner or a wax-and-grease remover. Any oils, dust or debris on the piece right before painting will affect your paint job in a negative way. You don’t want to remove the primer, so just a once-over should suffice.

10

Spray two to three light to medium coats of the paint, being very careful not to let the paint run. The nozzle head should be about 8 to 10 inches from the target, and it is better to spray in even spurts rather than holding the nozzle down the whole time, which would more likely give you runs and heavy spots. If you develop any runs, you will have to wait until the paint is completely dry–probably by the next day–and sand the runs down with fine grits of 1,000 to 1,500, then respray the piece.

11

Spray two to three coats of the clear-coat finish over your paint once it has dried at least 15 to 30 minutes. Be sure you have good lighting for this, since the clear will not show a color to follow but only a shine on the sprayed areas. Sometimes you have to observe your work from an angle.

12

Let the clear coat dry for two to three days, and then you can use a very fine rubbing compound to give you a very smooth, flat finish, which will remove any small flaws, runs and bumps from the clear coat. The compound will also provide a brilliant shine. Apply the compound with a wax applicator, let set a minute or two, and then buff out by hand — or you may decide to use a power buffer with a wool pad if it is a larger piece. You may now also apply your favorite wax after the compound to further enhance the shine and offer more protection to your finish.


How to Easily Clean your Paint Roller

Cleaning latex and acrylic paint from a paint roller can easily turn into a big mess. Here is a  simple way to clean a paint roller fast and with little to no mess:

1. Position the crook of the paint roller frame over the rim of a large garbage can with the roller hanging down inside the can.
2. Train water from a garden hose spray nozzle set to a tight pattern on the edge of the paint roller so it spins the roller at high speed.
3. Move the stream of water up and down along the paint roller for a minute or two until the water coming out of the roller is clear.
4. Take the roller off the frame and stand it on end to dry.


Epoxy Paint Vs Epoxy Coating

Confusion is at an all time high for DIY homeowners looking to apply an epoxy garage floor paint. Should I be using an epoxy coating or an epoxy paint? What is the difference? Which one is the better choice? To put these questions to rest we’ll explain the difference between epoxy paint and epoxy coatings.

Epoxy Coating is not paint

When looking to update the surface of your garage floor your first step is to usually apply a latex acrylic type paint. Many manufacturers often place a small amount of epoxy in the paint mix and refer to it as 1-Part epoxy paint What this gives you is better adhesion and durability than using acrylics. But rest assure this is most certainly not an epoxy paint.

The term epoxy paint stems from epoxy manufacturers taking notice of the terminology people were using when searching for epoxy coatings. So corporate marketing teams made the decision to brand their products as epoxy paints. This made it easier for consumers to find their products both in stores and online.

However, this is causing mass confusion and a general misunderstanding for the public. In fact, if you are seeing a product advertised as epoxy paint for your garage floor it is most likely paint. This can add to greater confusion when purchasing a paint product when it is truly an epoxy product.

What is an epoxy coating and how does it work?

20160525_104941
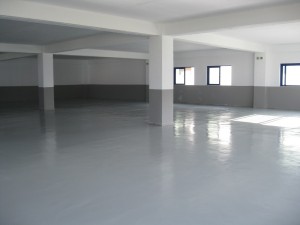
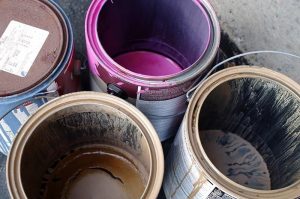
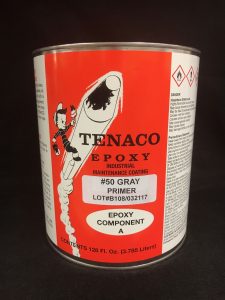
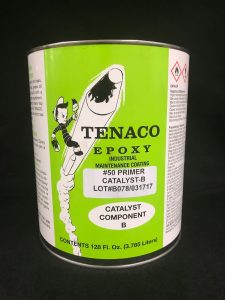
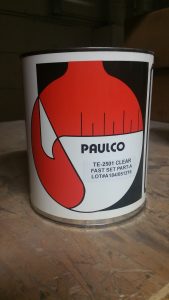
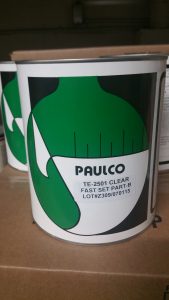
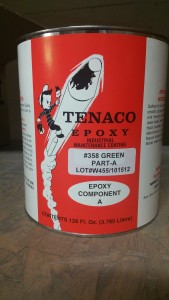
An epoxy coating is a two part product consisting of one part epoxy resin and one part polyamine hardener. Once this product is mixed you are on a race against time. Note that if your purchase a color epoxy you are actually tinting the resin. If no color is selected a resin will dry clear.

When using an epoxy coating keep in mind your completed surface is not just a gloss finish. Different than paint, epoxies provide a durable and resistant surface providing you with sustainable surface.

Application is breeze and you can gauge the thickness of the application based on the volume of the solids content. 50% solids mean that you have 50% of the product remaining on the floor.

Always research any epoxy coat system kits. Usually they will contain low solids and apply thin. This means you are cutting the lifespan of the surface down. Even if you are on a budget it will be worth the savings long term to go with a premium product.

In the future don’t cave into the name game when deciding on epoxy paint vs epoxy coating. As you can see, epoxy paint and epoxy coating are one in the same.  They are both an epoxy coating.  Do your research first, as this will help you to understand the type of epoxy you are purchasing and what kind of results to expect.

Welcome to our new site!

Welcome to our new website and blog!

After a couple of months of planning, we are delighted to announce the launch of our new website.

viking paints official blogWe hope you like our new look which is designed to make it easier to find the information, products and answers you are looking for. Our team at Viking Paints hope you like the feel of the design and layout of the site. We worked closely with our development team to deliver a easy to navigate and forward thinking modern design approach. This site is fully responsive and compatible with smartphones, tablets and all platforms across the board.

We will be updating our blog on a regular basis to keep you in touch with all the new things happening and products launching at Viking Paints, Inc.

Take a moment to explore our new site, perhaps bookmark us, and be sure to check back regularly for more information about our services as well as useful painting news and tips.